04.05.2013

Homemade Honey Peeps

Celebrate Spring with some homemade honey peeps!

honey-peeps-1024x679

Why make homemade honey peeps??

  • Free of yellow food coloring.
  • Made with 100% grass fed gelatin (I use this one —> grass fed gelatin).
  • Reduces allergy symtoms! Yellow coloring is made from powder quercetin.
  • Paleo/GAPS/allergy friendly.
  • Made with honey.
  • Because it is FUN!


Why gelatin?

  • Made from grass fed cows.
  • Help support hair, skin, and nail growth.
  • Helps your body detox!
  • Improves liver function.
  • Helps you digest food.
  • Decreases cellulite.
  • Good clean source of protein

learn more:

Read this post —> Food renegade

This post —> The Heathy Home economist


What is quercetin?


Where to buy? Use this powder or open up these capsules


INGREDIENTS:

Marshmallows: 

.
(get specific amounts in this Wonderful recipe. Special thanks to the Urban Poser!)
.
Sugar coating :
 
Mr. Peep’s eyes:

.

DIRECTIONS:

1. Make the marshmallow base. Use this recipe. I would suggest to cut it in 1/2 because it makes alot!

gelatin


2. Let the marshmallow base sit for a bit after making it. This will allow you to pipe better fuller bodied peeps. Just watch the marshmallow cream to make sure it does not get too hard to work with. You can try piping a few but you will know when it is perfect consistency.


fluff


3. Get a plastic baggie and fold edges over a cup. This makes it easier to scoop the marshmallow cream into the bag (like I did in this recipe with the chocolate). Cut a small hole at the bottom of the bag.

4. Make “sugar” coating.

SUGAR- If you want the traditional coating mix the quercetin and sugar until a nice yellow color.

COCONUT- If you are on GAPS or paleo, use shredded coconut and pulse it in the Cuisinart to make it finer. Blend in the quercetin. Sprinkle mixture (which ever one you choose) onto a cookie sheet.


peeps


5. Pipe your Peeps. I have my own method of doing this. Start with the bottom. It should be the longest section (oval with a fuller front) You can try to make the tail pointed. Then sprinkle in sugar coating. Pipe the head (circle). Sprinkle with sugar. Pipe the beak (circle and swoop up!). Sprinkle with sugar.

If you are using the coconut shreds then I would suggest piping the peeps first without sprinkling the coconut in between. It is too heavy and will flatten the peeps more. Just pipe like I said. Wait until they harden a bit, but are still sticky and then sprinkle.

6. Make “eye” paste. Mix some cocoa powder in a bit of honey and use a toothpick to dab on the eyes. You can also use the vanilla bean seeds if you have any left over. The cocoa powder/honey works and looks better though.


done-1-1024x679


7. Let set out uncovered for a few hours or until they reach the hardness you like. Once they are just how you like them, store in an an air tight container (not in the fridge). Delicious!


done-2-1024x679

 These peeps are gooey. fresh. fluffy. sweet. and made with love.

up peep


~Stay Gutsy, Caroline

,

disclosure 3
02.02.2013

Orange-Lemon Jello Stars

Let me introduce Katie from www.girlmeetsnourishment.com!

I found Katie’s blog just about a week ago. I e-mailed her telling her how much I loved her blog and mentioned that she should join the VGN network (the blog network I am in). I find out that she is already in the works of becoming a VGN blogger. I am super excited to have connected with her, because I know that all you will just LOVE her recipes and personality!
Arthritis is a curious condition. You feel stiff and it hurts to move whatever part of your body that is affected. But I am getting ahead of myself, let me first tell you a story.

When I was a youngster, I lived on Long Island which is part of New York. I was in first grade sitting in the very front seat of the bus. The bus driver stopped to let some kids out, and I wanted to stick my hand outside to see what the temperature was. Before I knew it, my hand was closed in the bus door right at my knuckles. While it was very uncomfortable, I was too afraid to tell the bus driver that my hand was stuck fearing that I would get in trouble; so I sat forward in my seat with my hand closed in the door until the next bus stop. After my hand was released, I sat quietly back in my seat and vowed never to do that again.

Screen Shot 2013-11-15 at 10.00.28 AM

A few days later, after a big dinner at my grandparents house, my Dad was sitting around the table with the rest of the “grown-ups” chatting. I was doing something in the kitchen and then made my way back through the dining room when my Dad asked me to come over. My knuckles were swollen, red, and large. I still hadn’t told my parents about the bus ride home, and I was sure that must have been what caused it. I told them about what happened on the bus but they didn’t seem to think that was what caused it. They quickly set up an appointment for me with a pediatric rheumatologist. Before I knew it, we were making regular trips to New York City to see a specialist for my Juvenile Arthritis. I began taking these disgusting tasting pills, and since I was too young at the time to swallow pills, I remember my family mashing the pills up into a powder and mixing them into my jello and yogurt. I can still remember the horrible taste!

My body healed itself!

My knuckles looked swollen and I was self-conscious of my hands because I felt they looked disproportioned to other people’s “normal” knuckles. But years passed and in that time, my body healed itself and my arthritis went into remission. I have since grown into my hands and now I do what I can to take care of my joints to avoid any flare-ups or arthritis in the future.

I am strong now!

What is Arthritis?

Most commonly, arthritis is known as an auto-immune disorder that causes your body’s immune system to attack the joints in your body, which results in painful inflammation and movement. However, there are several types of arthritis that have different causes:

  • Osteoarthritis, which is the most common type of Arthritis and usually affects people in their later years of life. It is caused by damage and the break down of the body’s joints over years of use.
  • Rheumatoid Arthritis (RA), which is when the body’s own immune system attacks itself causing painful inflammation in joints and eventually will start to breakdown the cartilage in the joints.
  • Gout, surprisingly, is also a type of arthritis which causes painful uric acid to collect in the joints.
  • Septic Arthritis (also known as bacterial or infectious arthritis), is caused by an infection that inflames the joints.
  • Psoratic Arthritis, which has symptoms similar to RA: painful inflammation of the joints that can causing swelling and be accompanied by psoriasis (a skin condition that causes scaly plaques on the skin).

Three Ways to Care for Your Joints

Since there is no cure for arthritis the best thing you can do is start protecting your joints now! These are a few tips I have learned to employ over the years that keep my body healthy and my arthritis in remission. Best thing about these tips, they are all natural and you can start doing them today!

1. Exercise

Getting regular exercise is not only good for your cardiovascular system and overall health, it’s good for your joints! Be sure to warm up first which will lubricate your joints and get your body ready for the exercise to come. Be sure to always keep good form when doing exercises and always stretch after a workout which will allow your body to recover. Keeping good form is especially important because any accidental injury we may cause to our joints can put us on the road to Osteoarthritis. Strength training is also important, because the stronger your muscles are around your joints the better protected they will be. Your body is an amazing thing, so just listen to it! If something doesn’t feel right, stop – it knows best!

2. Posture is Key

I am guilty of being a slouch but I do work hard to keep my posture good. I (try to) keep my shoulders down and my back arched just the right way. Keeping good posture protects your joints by keeping your body in natural alignment which causes less strain. Visit this excellent post on Thank Your Body to find three simple stretches for good posture.

3. Eat gelatin rich foods!

Say what? Eating jello is good for my joints? YES! And how sweet it is. Getting gelatin in your diet from rich, homemade bone broths or even homemade jello made with grass-fed beef gelatin is essential to keeping your joints and cartilage strong, according the Weston A. Price Foundation. Gelatin is such a superfood, and research has shown that getting adequate gelatin helped improve symptoms in patients with RA. Gelatin has so many health benefits far beyond what you can imagine, besides just helping to protect your joints, it does a multitude of other amazing things that can be found in the article “Why Broth is Beautiful“. But be sure when you start eating gelatin that it’s the good stuff, not the box you find on the supermarket shelf…in fact, make my recipe for Orange-Lemon Jello Stars below! It’s super easy. Protect yourself with a few of these babies:

Orange-Lemon Jello Stars

Screen Shot 2013-11-15 at 10.00.36 AM

Ingredients:

4-5 large organic oranges
1 to 1 and 1/2 cups organic lemon juice
3 and 1/2 tablespoons Unflavored Gelatin
3 to 5 tablespoons on raw honey (depending on how sweet you like it)


Directions:

1. Juice the oranges into a large measuring cup, be sure to use a strainer to catch all the pulp. I got about one cup of orange juice from my oranges and then I added another cup of lemon juice to it, bringing the total amount of fresh juice to 2 cups.

2. Next, in a medium saucepan, combine the gelatin, honey, and juice over medium heat. Whisk until all the honey and gelatin is dissolved and the mixture is warm.

3. Carefully pour into fancy ice cube trays and place in the freezer for 20 minutes (or allow to set in fridge for a couple of hours).

4. Pop out and enjoy these little treats that will keep your joints happy!

Cheerio!

Katie

Sources:
1. WebMD: Most Common Arthritis Types
2. WebMD: Septic Arthritis: Symptoms, Diagnosis, and Treatment
3. WebMD: Psoriatic Arthritis
4. Mayo Clinic: Arthritis Causes
5. Prevention: Exercising
6. WAPF: Why Broth is Beautiful
7. WAPF: Stocks
8. How Stuff Works: Top 10 Ways to Protect Your Joints

disclosure 3
12.03.2012

Rooibos Cream Jello

Remember Lauren from empowered Sustenance? She did a guest post here a while back on going too low carb on the GAPs diet. We have been friends and watched each others blog grow. I think you will be pleased how AMAZING her blog is looking recently. Go check it out here! She has the most unique GAPS friendly-nut free recipes around!


A Sophisticated Jello

Jello provides plenty of entertainment to eat: jiggling it on the plate, wiggling it with a fork, and slurping it through one’s teeth. While jello obviously has the fun factor, it lacks a certain elegance. It is the kind of dish you enjoy by yourself… not really something you would serve to guests.

Until now! With a few simple ingredients, gelatin turns rooibos tea and coconut milk into a sophisticated treat, perfect as a snack or dessert.


I tried to further convey the chic-ness of this jello by featuring some refined-looking books into the photos. I figure I can’t go wrong by throwing in a copy of The Complete Works of Shakespeare and a fancy-schmancy poem book!


What is Rooibos?

Rooibos is my all-time favorite tea. It is made from the redbush plant in Africa and boasts a mild, slightly earthy vanilla flavor. You can also find it under the name red bush, redbush, or African red tea. When buying the tea, check the ingredient list to make sure it contains only redbush leaves, no “natural flavors” or other types of tea leaves.


Rooibos Cream Jello


INGREDIENTS:

2 cups strongly brewed rooibos tea (also called red bush or African red tea), cooled

2 tbs. grassfed gelatin, such as Great Lakes

1 cup additive free coconut milk

1 heaping Tbs. raw honey


DIRECTIONS:

1. In a small bowl, combine 1/4 of the cooled tea with the gelatin. This makes the gelatin dissolve without lumps.

2. Let the gelatin mixture sit and heat the remaining tea to a simmer in a saucepan.

3. When it is just barely simmering, whisk in the gelatin mixture and the coconut milk.

4. Let cool slightly, then whisk in the raw honey. Taste and add more honey, if necessary.

5. Pour the mixture into a rimmed dish and refrigerate until set, about 4 hours.

6. To unmold, fill a large pan with very hot water. Place the dish with the jello in the hot water bath so the hot water comes up to the sides (but don’t let the water overflow into the jello!). Hold it in the hot water for about five seconds, until it has loosened from the dish. Don’t keep it in the hot water too long or it will start to melt.

7. Quickly place a plate on top of the dish and invert the jello onto the plate. Cut out with cookie cutters and enjoy!

Eat well and heal!™


About Lauren

Screen Shot 2013-11-15 at 10.05.20 AM

Lauren is the 19-year-old real food blogger at EmpoweredSustenance.com. After struggling with ulcerative colitis for five years, she decided to dive head first into healing her body with nutrition and a holistic lifestyle. She follows the GAPS diet and enjoys sharing her creative, grain free recipes and healing tools with others. She offers a free, retro-inspired Grain Free Holiday Feast e-cookbook on her blog.

.


.

~Stay Gutsy!

disclosure 3
08.03.2012

GAPS Coconut Milk Yogurt! (dairy free)

Yum Yum yum.

GAPS coconut milk yogurt is the answer to your dairy free yogurt dreams!

Here is a recipe I know a lot of you have been waiting for. Thanks for being so patient!

googo

The road to the perfect recipe…

I have been experimenting with coconut milk yogurt for quite some time. After trying recipe after recipe, I decided to just go with my gut, and do what I thought would be best. Coconut milk yogurt experimentation should not be taken lightly! I don’t know about you, but for me, gelatin is hard to  get the hang of. Its tricky to find the exact consistent you want and you won’t know until many hours after you add it into the yogurt. I know that on GAPS many of you still cannot have dairy, even though it is fermented. It can take many months to heal your gut so you can have dairy again. In the mean time, don’t deprive yourself of your favorite foods! If you were once like me and loved your big bowl of yogurt and fruit, then giving yogurt up was hard! This is where coconut milk yogurt soars into the rescue 🙂

My big coconut milk yogurt flop!

I tried all types of dairy free yogurt but they were all filled with wired gums and goos. I thought to myself..why not make my own?! Well the first few times it was a big flop. I didn’t know that coconut milk doesn’t thicken like regular yogurt, so mine turned out exactly like cultured liquid coconut milk. I tried putting it through a cheesecloth..and well I got like 1/2 cup worth. I then brought out the Unflavored Grass fed Gelatin, and voila, this recipe was born. *confession: I actually put too much gelatin in and I didn’t want to waste it so I used beaters to see if anything would happen…YEP it made the perfect yogurt! I hope you like it as much as my friends and family do 🙂 Your effort will be well worth it.

Is coconut milk good for you?

YES! Coconut milk is one of natures best foods for your body! Think about the old days where you would find a coconut in a tree and it could be a whole meal. No wonder why there are so many different coconut products!

Coconut milk is filled with…

  •  lauric acid which is a fatty acid that is found in mom milk.
  • It promotes brain development and healthy bone growth.
  • It is a super anti viral, anti fungus, anti microbial. That means it can kill off the bad guys that make you sick or give you candida.
  • Coconut milk helps to control you weight, because fat does not make you fat.
  • It is filled with minerals so your skin, hair and even attitude should be better.
  • You bones will benefit from the phosphorus and iron will pump into your blood…and I am just getting started 🙂
  • Better yet coconut milk is great for the immune system and it easy on the gut. So if you are sick or on GAPS, coconut milk is a good choice.

Ferment it!

Whats better than plain coconut milk you ask? Fermented coconut milk. When you make this yogurt you are adding cultures to it. Anything fermented is always easier to digest for your body. Adding the grass fed gelatin is just an extra bonus. Really, this is one of the perfect GAPS foods. I consider this a truly gutsy food 🙂

Recipe Update: I want to make an update on this recipe. Many people have expressed how this recipe is time consuming, which I would have to agree. I have found that you can completely skip the fresh young coconut part and just used canned coconut milk, gelatin, an a starter or probioitc powder. Steps 7-12 are optional. I find that the young coconut just adds more nutrients and minerals but it actually tastes almost the same. I hope this helps 🙂

INGREDIENTS:

* I list using both coconut milks in this recipe because I find that the canned stuff is creamier, but more expensive. So I mixed the two. Feel free to just use one if you would like.

4 cups homemade coconut milk

1 ½ cans / (20.25 oz) / 2.5 cups :  coconut milk (BPA free) or this brand (no additives)

1 pureed young coconut meat (optional)-  This doesn’t really change the texture much. I like to use the water for young coconut water kefir, so I always have left over meat. Adding the young coconut meat also helps feed the fermentation process.

pinch of sea salt

3 TBS organic sugar or raw honey

8 tsp Unflavored Gelatin (grass fed)

1 T vanilla (optional)

(Bacteria options): 1 packet of vegan yogurt starter, ½ cup premade coconut milk yogurt, open a few probitoic capsules or few scoops of this powder.

DIRECTIONS:

img_491413

1.  Make homemade coconut milk

DSCN2317

2.  Heat the 4 cups of homemade and the 1 ½ cans of canned coconut milk together in a stainless steel pot on the stove. Heat to 180 degrees. Use a candy thermometer.

DSCN2320

3. Take out 1 cup of the warm coconut milk, sprinkle the gelatin on the milk, and stir the gelatin until dissolved all the way. (This step is important so you don’t end up with gelatin clumps).

4. Add the 1 cup of dissolved gelatin/coconut milk back into the pot of warm coconut milk.

DSCN2321

5.  Add the sugar into the warm milk and stir until dissolved.

6. Let the milk cool down to 100 degrees. This takes a few hours, so I just left it on the stove to cool. Don’t put it in the fridge or ice bath because remember it has gelatin in it, and if you forget it, it will gelatinize.

DSCN2313

7. (optional step) While the coconut milk is cooling, crack open a young coconut. Learn how here!

DSCN2417

8. (optional step) Take 1 cup of the cooling coconut milk in the pot. (It doesn’t matter the temperature) and pour it into a blender.

DSCN2315

9. (optional step) Spoon your reserved young coconut meat from step 7. into the blender as well.

DSCN2319

10. (optional step) Blend away until smooth. It will be liquidly and easy to pour. DSCN2422
11. (optional step) Once the big pot of coconut milk is cooled down to 100 degrees, add the blended coconut meat minxture from step 10.

DSCN2408

12. (optional step) Stir.

DSCN2398

DSCN2399

13. Sprinkle over your culture starter (or premade coconut milk yogurt) into the coconut milk. I like to pour my coconut milk out of the pot and into a bowl with a spout.

DSCN2403

14. Stir

DSCN2411

DSCN2414

15. Pour coconut milk into 2 quart ball jars and screw on metal lids.

DSCN2416

16. Keep at a constant 110 degrees for 7-10 hours to ferment it. I put mine in my Excalibur dehydrator. But an oven would work too. You need the heat so the bacteria grows.

17. Check and taste after 7 hours to see if the sugar has been eaten up. It should not be as sweet anymore. If you want it sour, keep it going a few more hours.

DSCN2436

18. After it has been fermenting, you will see the liquid separated at the bottom. You will also see that it has not thickened. This is normal.

19. Refrigerate for 7-10 hours until firm.

DSCN2439

20. Take out of the fridge. The coconut milk should be solid like Jello. This is good!

DSCN2440

22. Spoon both coconut milk yogurts into a bowl.

DSCN2442

DSCN2443

DSCN2444

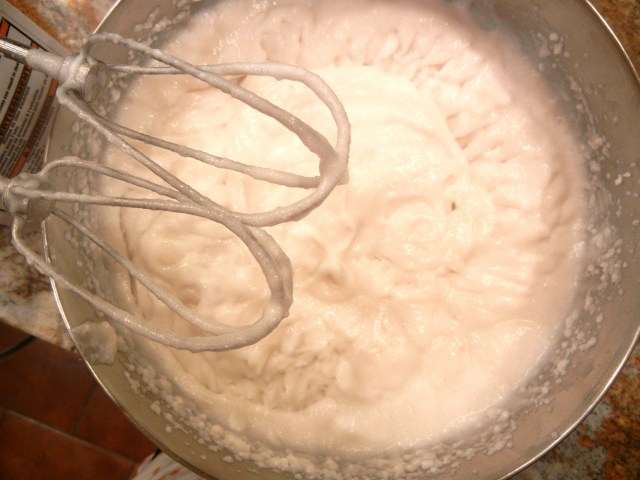
23. Beat the jello consistency coconut milk, until it is smooth and has no more clumps. This takes a few minutes. It will go through stages. Jello cubes, chunky, and then creamy.

DSCN2447

24. If yours creamy enough? If not keep beating..

24. Transfer the fluffy smooth coconut milk yogurt (should be a pudding texture) into a bowl (to eat) or back into the jars (to save for later)–> I like to use these single serving jars. It will be a little thicker once it has been refrigerated again for a few hours!

DSCN2466

25. Enjoy your yummy hard work!

Topping ideas:


cooonn

~Stay Gutsy, Caroline


disclosure 3