07.23.2012

Homemade Magnesium Oil

I have to say one thing…I LOVE magnesium oil!!

maga mag

Why I use magnesium oil

I started using homemade magnesium oil ever since I read this post from Cheeseslave blog. It has helped my body tremendously! I used to have constantly tight shoulder traps and a stiff neck from the stress of being sick. When I say sick, I mean catching colds all the time due to my weak immune system. I am sure that magnesium oil has contributed to helping my body heal.

Also I never get headache anymore! Once every few months I would get a bad migraine and all I could do was cry and lay in a dark room. Ever since I started using magnesium oil, I have not had one single migraine! Not only that, but I was also prone to headaches throughout the day. But now I actually can’t remember the last time I have had one! My life is SO much better without headaches!

Not only does my body benefit from it, but my mind does as well. I always have so much on my mind and sometimes it can get annoying because thoughts keep racing around. After a few months of supplementing with magnesium oil, I could tell a difference in my mental clarity and peace.

How I use homemade magnesium oil

I used to supplement only with Mega-Mag Liquid. I am sure it helped my body somewhat, but the oil really gave my body that boost it needed. Your body absorbs so much more magnesium through your skin. I highly recommend this book. My gut is still healing and I think I still have ways to go. One component of the healing process is my religious use of magnesium oil. I use it morning, afternoon and night.

I crave magnesium!!

My body almost seems to crave the magnesium oil, which is sort of weird, but the human body is very smart :). If I go too long without spraying it on my body, I start to feel a little anxious and my muscles get tense. When my muscles get tense, my neck seems to come out of adjustment easier too. So magnesium oil sometimes saves me an extra trip to the chiropractor!

What’s that sting?

Just as a warning, the magnesium oil also seems to sting in sensitive spots of the body. Personally I cannot put it on my legs, creases of my arms, face, or fingers. But my sisters and mom have totally different sensitive spots. I just don’t put the oil on those spots. If some spot on my body does start to sting a little, all I have to do is wipe it with a damp cloth and I am all good! When I say sting, it is not that bad. I am referring to a more irritating sting, rather than a hurt sting. If you are worried, start with the bottom of your feet, hand palms, and your stomach.

Better than supplements

I don’t handle foods rich in magnum like nuts, grains and beans. Since I don’t eat these foods, I have a feeling I am extra deficient in magnesium. Your skin absorbs magnesium much better than if you were to take it by supplement. I am also a big fan of epsom salt baths, because it is literally a big bath full of magnesium!

It’s cheap!

You are also saving a lot of money when you make homemade magnesium oil, and it is just as good as the store bought kind which is $23! If you make it at home you only spend around $1 -$2 for 8 oz, depending on the amount of flakes you order. That is just crazy!

So now I will quit blabbering about how much I love this stuff and teach you how I make it! I got this idea from this post. Thanks Cheeseslave.


INGREDIENTS:

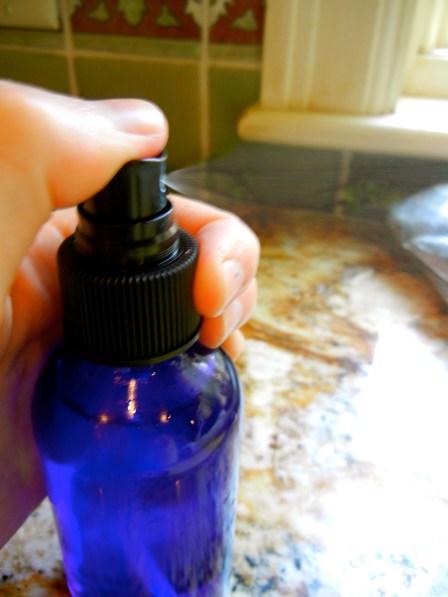
Blue Glass 4oz spray bottle or glass jar

1 cup of Ancient Minerals Magnesium Bath Flakes (next time I need to buy the 6.5 lb flakes!)

1 cup of filtered water (I use my berkey water)


DIRECTIONS:

* I always multiply this recipe by four so we have enough to last us a few months.

DSCN2322

 1. Measure out 1 cup of filtered water (I used a ball jar as my measuring cup!).

DSCN2323

2.  Pour 1 cup of water into your stainless steel pot.

DSCN2326

DSCN2327

3. Measure out 1 cup of magnesium flakes.

DSCN2328

4. Pour your 1 cup of magnesium flakes into the water in the pot.

DSCN2330

DSCN2331

5. Put the pot on the stove and turn the heat onto low/medium. Heat just until the flakes dissolve all the way. Stir in-between.

**note: You don’t need to heat the flakes and water. On several occasions I just let the flakes sit in the water until they dissolve. It takes a bit longer but works just as well. 

DSCN2332

6. Remove from heat and let the magnesium water cool down to room temperature. Takes about 30 min.

DSCN2336

DSCN2337

7. Pour the magnesium water into a glass jar or the glass bottles with the help of a funnel.

* What you are really making is “magnesium water”, but the flakes seem to dissolve into an oily like consistency, hence the name, “magnesium oil”.

DSCN2338

DSCN2340

DSCN2342

8. Spray on your body! Soak in the magnesium!

* I personally like to use the spray bottles and keep the extra “oil” in glass jars to refill the spray bottles. I also have an 8 oz glass spray bottle that I got from my coop, so it can hold more. But any spray bottle is good 🙂

Wasn’t that easy? Your body will thank you for it.

UPDATE:

I got a response from the Ancient Minerals company about making magnesium oil with the flakes. Take a look please.

“The magnesium oil itself is a direct result of the process that is used to mine the magnesium chloride from the Zechstein seabed. 

However…

Magnesium chloride is hygroscopic, which means that it readily retains and attracts moisture.

Unlike the oil, the flakes are produced by an evaporating process which requires high heat. To produce the flakes, the magnesium oil is heated up to approximately 160 Degrees Celcius (320 Fahrenheit) and the water is evaporated until a concentration of 47% of magnesium chloride is reached. Due to the heating process needed for evaporation, a small amount of MgCl2 will decompose to MgOHCl (magnesium hydroxide chloride), MgCO3 (magnesium carbonate) and HCl (hydrochloric acid) in the vapor stream. These resulting compounds are responsible for the cloudiness that can be seen after dissolving the flakes. They are not hazardous but are products of the necessary production step to get the flake crystals. For applications with low magnesium concentrations, such as bathing applications, the flakes are perfectly suitable.

For applications with higher concentrations, we recommend the purity that can only be achieved by using the magnesium oil – straight from the source without any heat treatment.”

So They are saying that the concentration of magnesium is higher in their magnesium oil (this stuff) compared to the homemade stuff. You could just apply it more times a day or even try adding more than 1 cup of  flakes to 1 cup of water. Try adding 2 cups if it dissolves all the way.

If you don’t see any benefits from using the homemade stuff after a few months, you might need a stronger concentration. Though, I seem to do fine with the homemade recipe as of now!

~Stay Gutsy, Caroline

disclosure 3
07.18.2012

Cinnamon Coconut Chips (GAPS)

I Love coconut!

If you love coconut and crunch you will love these cinnamon coconut chips! Coconut is a life saver on the GAPS diet. You can make it into flour, sugar, flakes, chips, chips, oil, milk, and cream! Am I missing anything?


Cinnamon coconut chips were born..

Well I came across these big coconut flakes at my coop, and immediately my wheels started turning! They are also known as coconut chips, which is a perfect name for them. At my house, you cannot go wrong with cinnamon. It turned out to be the perfect combination!

Satisfy your craving

The GAPS diet lacks that crunch that you might have had before starting the diet. These coconut chips will really satisfy your crunchy craving. There are endless flavor combinations for these chips. When my sisters tried these, they said they tasted like cinnamon potato chips and without the cinnamon they would take just like potato chips! The coconut flavor turns into a more toasted flavor after it cooks. Yum! They cook VERY fast, so 3 minutes is the maximum! You are better off just standing by your oven with your mitt ready.

Cinnamon Coconut chip nutrition

Cinnamon is high in calcium, manganese, and fiber. While raw coconut is high in protein and minerals! Remember coconuts grow by the sea. This is actually a super food snack, so nibble away! I know that stevia and xylitol are not GAPS legal, but I never did well with honey, so I use stevia. My younger sister (who is not on the GAPS  diet) doesn’t like stevia, so I decided to use xylitol because it is in granule form. Coconut sugar would work as well. Though if you don’t have a big sweet tooth, you may not need any sweetener.

Flavor combos!

Here are some flavor combinations for you to try as well. Each flavor combination is for a recipe that calls for 2 cups of coconut chips.

onion and garlic:

1 tsp onion powder 1 tsp garlic powder 1/4 tsp sea salt

Chili lime:

zest 1/2 organic lime 2 tsp chili powder 1/2 tsp onion powder 1/4 tsp sea salt

Plain:

1/2 tsp sea salt

INGREDIENTS:

2 cups dried unsweetened chips (also known as “flakes”)

2 tsp cinnamon

pinch of Stevia Powder or 1-2 TBS Xylitol (not from corn)

(optional – “sweet and salty” –  1/4 tsp  Celtic Sea Salt)

DIRECTIONS:

1. Preheat oven to 375.

2. Measure out 2 cups of coconut chips into a bowl.

3. Pour cinnamon onto the chips.

I just reused my 1 tsp spoon and guessed what would be about 1/4  tsp 🙂

4. Add salt (optional) and sugar.

Lets get a close up…mmm.

5. Toss together with your hands. 6. Lightly oil your baking pan with coconut oil, whip off excess oil with a paper towel.

7. Spread out onto baking sheet and bake for 2-3 minutes. (Shaking it spreads it out easily). Give it a shake or a rough toss after 1 -1.5 minutes. WATCH the coconut like a watch dog! They will burn within a few seconds if you over do it.

Do you see that the coconut gets nice and golden/toasty looking, especially around the edges?

8. Take out of the oven. Let cool for a few minutes and then put into a bowl.

9. These will keep for a long time…but I don’t think they will last long around your house either 🙂 Enjoy and have fun experimenting with flavors!

~Stay Gutsy, Caroline


disclosure 3
07.17.2012

Vanilla Honey

What is vanilla honey?

If you can’t tell, I made vanilla honey. Oh, this stuff is just the BEST!

I cannot wait to share this with you! I made this a week ago and I don’t know why I waited this long to share it! I think it’s because I didn’t get around to taking pictures that day, and by the time I wanted to..it was all eaten! My mom and sister LOVE vanilla and honey, so this quickly turned into their favorite.

Vanilla honey is simply honey infused with vanilla seeds and the pod. It is ok to eat the little seeds but please don’t eat the pod…Ha! That would be a little crunchy!

honey

Vanilla honey nutrition:

Raw honey is a super food. It contains raw enzymes because it is not heated. These enzymes are needed to digest the sugars in your body. Raw local honey is also a amazing remedy for allergies, sore throats, fatigue, anxiousness, coughs, burns, and the list goes on! Even better, raw honey is GAPS friendly! The vanilla beans are packed with the b-complex vitamins. B-vitmains help relate you metabolism and nervous system. It also contains small amounts of trace minerals. I think vanilla and honey were destined to be together!

Where did I get my vanilla beans?

The recipe can’t get much easier. The hardest part is finding good quality vanilla beans for a decent price. Pure vanilla extract is quite expensive at the store and fresh vanilla beans go along way, so I think this is the way to go. I am planning on making vanilla extract in the future too! I got 54 Vanilla Beans through amazon for $27.69 (free shipping with a prime account). That is about $0.50 a bean!

I took a lot of pictures to make it easy for you to follow. I love the look of pure tiny vanilla pod seeds, they are so delicate. Have fun using the vanilla honey in anything you would normally put honey and vanilla in! Yum!

How to store vanilla beans

After I opened mine, I put them in a plastic bag in the freezer to keep them fresh. I had a few start to mold when I kept them in the cabinet. oops! That is because the kind I got are not dried.  Just deforest them in the fridge before you use one.

The “vanilla honey song”

I think its so good that it deserves a song… oh I ♥ vanilla honey, oh yes I do, yes it do. Vanilla honey is the best, it is above all the rest..oh ♥ vanilla honey 🙂


INGREDIENTS:

1 pint of raw honey (2 cups) <— local is best!

1 vanilla bean <— This is the brand I choose.


DIRECTIONS:

DSCN2182

Here are my 54 vanilla beans. 

VV1

A healthy vanilla bean should be plump, slightly soft and have a strong vanilla scent!

1. Cut open 1 vanilla bean. You will have to push firm to open the skin, but not too firm that you cut the whole thing in half!

bb2

2. Peel away the sides of the vanilla bean with your knife and fingers.

DSCN2194

DSCN2198

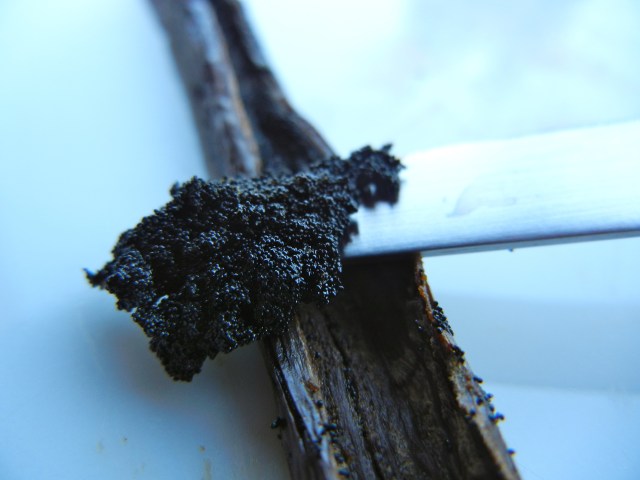
Take a closer look at those gorgeous vanilla seeds. They are packed with flavor and B-vitamins!

3. Scrape out the vanilla bean seeds with your knife. Don’t worry if you can’t get all of them out, because you are putting the whole pod in the honey jar anyways.

DSCN2200

I got my pod all hollowed out.

DSCN2202

I love this picture!

DSCN2203

4. Set your scraped vanilla pod seeds off to the side. I got about 1/2 a tsp out of 1 plump vanilla bean.

DSCN2204

5. Chop or cut (with kitchen scissors) your hollowed vanilla bean into thirds.

VV2

Hehe! Sorry about my messy fingers. The vanilla seeds got all over and into my nails 🙂

6. Drop your hollowed chopped vanilla pods into your honey jar. I used and old (pint size) honey jar for this recipe.

7. Pour 2 cups of honey into your honey jar.

DSCN2210

DSCN2213

8. Carefully drop your pile of vanilla bean seeds into your jar filled with honey.

vv3

 The honey looks so gourmet, because you can see the little seeds suspend in the honey. mmm.

9. Stir, stir, stir. I stir my honey and vanilla with a kabob stick. I use an up and down motion because the seeds like to float to the top.

10. To get maximum flavor, infuse your honey in the sunlight for 1-2 weeks. After 1 week, the flavor and scent will be much stronger. When the vanilla flavor is strong enough for your taste, put it back where you usually keep the honey. It will keep just as long as a jar of regular honey will.

*Before using, stir because the vanilla pod seeds tend to migrate towards the top.

11. Use  vanilla honey in anything you would normally use honey and vanilla in. Get creative! We put ours in…


how to b


BAMILLA

~Stay Gutsy, Caroline


disclosure 3
07.14.2012

GAPS Chocolate Pudding

The (secret ingredient) healthy pudding!

Sorry for leaving you guys hanging when I mentioned the chocolate pudding in the Frozen Avocado post. Today I will show you how to make it!

pudd

 Shhh. The secret ingredient is avocados. Don’t tell anyone who wouldn’t like it if they knew!

A GAPS treat

When my older sister came home from college this summer, my mom and I put her on the GAPS diet. She is doing pretty well on it, but the food can get boring. She tries adding new things into her diet, but reactions are still frequent for her. This is a sign she might be introducing foods too fast. To help with the variety of food that she can tolerate, I decided to add something very tasty into her diet. It wasn’t long after I made this pudding that she would constantly ask for it! Thats how good it is!

It tastes  so “normal”

I also served this pudding in little cups at my graduation party. No one knew that these were healthy. Better yet, one of my friends who tried this hates avocado’s and she LOVED the pudding. I never told her that it had avocados in it ;). Sometimes it is better not to say anything about the ingredients in food around here!

This is GAPS friendly, assuming that you can have chocolate. If you cannot have chocolate, carob would work (powder or squares, just taste as you go) or even just some cinnamon (it might look a little wired because it is avocados, and they are green. But who really cares if it tastes good! Right?)

I hope you like this recipe as much as my family does. It has become a staple in my house! This chocolate pudding is rich though, so don’t over do it. It is sure easy to, because it tastes so delicious!!


INGREDIENTS:

3 cups smashed (fresh of frozen) avocados 

1/2 cup raw coconut oil (melted)

4 (1 oz) squares of bakers unsweetned chocolate or 3/4 cup cocoa powder

3/4 cup raw honey

2 Tbsp vanilla or 1 vanilla bean (learn how to scrape out seeds here)

1/2 tsp sea salt


*This recipe makes about 6 cups of chocolate pudding. It lasts for 1-2 weeks in your fridge. It might even last longer, but mine has not lasted that long without being eaten! You can always make half a batch if you want.

DIRECTIONS:

1. Peal and smash avocados

DSC_0052

2. Put smashed  avocado’s in a big bowl.

DSC_0057

DSC_0059


DSC_0077

3. ** If you are using the bakers unsweetned chocolate…Unwrap and melt the chocolate in a double boiler (or a heat proof bowl over boiling water). If you cut up the pieces of chocolate, it will melt faster and easier.

DSC_0063

DSC_0069

4. Add the coconut oil (melted), honey, salt, melted chocolate or cocoa powder, and vanilla to the bowl. Roughly stir to incorporate all ingredients.

DSC_0070

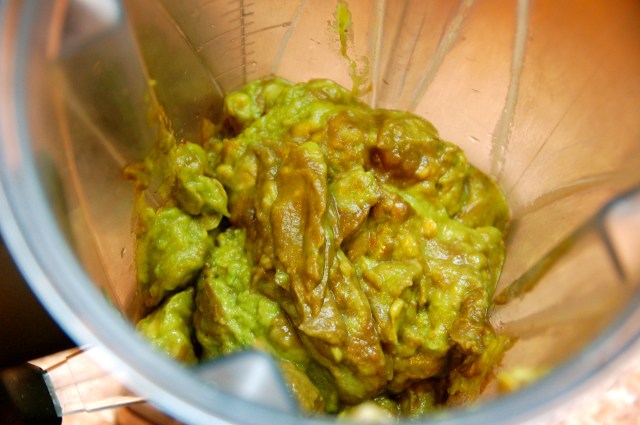
5. Put half the mix into the the blender <– I use this one or Cuisinart. (I have learned that the Vitamix blender makes the pudding the best texture. Sometimes the Cuisinart or a regular blender will leave the pudding a little less silky, but still GREAT!)

6. Blend all together. I actually had to blend in 2 batches because it seems to put less stress on the blender and it runs smoother.

7. Scrape out the blended pudding into a container or a ball jar (I like to use a small spatula).

8. Blend the other half of the pudding. If you have a Vitamix, it is helpful to use the black plunger to keep the blade running, because this pudding is thick! If you don’t, you might have to stop the blender or Cuisinart to stir it a few times.

9. Scrape the other half of the pudding out of the blender.

DSC_0081

10. Serve just as is! Refrigerate leftovers (I always make a big batch of GAPS foods because it is easier to make a big batch of one recipe, than remaking it over and over again. I like to save time).

* It will be hard when you take it out of the fridge (the coconut oil turns hard when cold). If you like a softer texture, just keep it on the counter for 15 min and stir before you eat. Cold tastes just as good though.

11. Yum!

gogo3

~Stay Gutsy, Caroline


disclosure 3
07.13.2012

Flavored Kombucha! (2nd ferment)

It’s Kombucha Time Again!

Do you love flavored kombucha?

So A while back I posted how to make kombucha and a little extra information about it! Today I am going to teach you how to 2nd ferment your kombucha so you get that flavor and fizz. If you buy your kombucha at your health food store, then you are probably going to like this part of the kombucha process. The kind you buy at the store is flavored with some kind of juice and bottled in individual bottles. We are going to do the same thing, but in your own kitchen!

Store bought

If you want a recommendation for a good store bought kombucha brand, try Kombucha Wonder brand. They have some really good flavors and are all organic. Though for some of you who drink it like crazy or like to choose your own flavors, you are better of making it yourself! You save a lot of money this way too.

Fizz it up!

The second fermentation is so easy and quick. The juice increases the carbonation of the komucha and makes it taste fruity and yummy! Experimenting with different flavors are really fun too. I find that some juices make the finished kombucha fizzier then others. Lemon ginger really isn’t that fizzy while cranberry, cherry, and pineapple are really bubbly! I think it has to do with the sugar content. Though, sometimes your kombucha has a mind of its own, so you might be in for a little surprise!


Here are a few questions answered for you..

What do i use? I reuse bottles from the store-bought kombucha, pellegrino bottles, ball jars, or quart juice bottles. Just make sure it is glass.

How much flavor for my bottle size? Well really it depends on your taste. These are the measurements I use. If you have no idea what you like, go ahead and try my recommendations and you can always alter it to your liking as you learn!

80z (little glass juice bottle)- 2 TBS

160z (GT bottle)- 1/4 cup

24oz (Pelligrino bottle)- 1/3 cup

32 (Big glass juice bottle)- 1/2 cup

Flavor options:

I like to fresh squeeze my juices (when I can) and then strain out the pulp & seeds with a nut milk bag, muslin, or cheesecloth. I then use the pulp to make pulp crackers in my dehydrator or add it to smoothies or baked goods. Get creative!

Cherry vanilla (Cherry juice and a few tsp of vanilla extract)

Orange Grapefruit (Orange juice and Grapefruit juice. Fresh squeezed is always best!)

Pineapple pomegranate (My favorite!)

Apple berry (Apple juice and mixed berries)

Peach

Mango strawberry

Kiwi (a favorite)

Watermelon lime (Ha! this one is easy. Watermelon has so much juice to share ).

Blueberry lemon

Ginger lemon (Boil a handful of fresh chopped ginger for a few hours to make a syrup. This syrup if potent so you might not need the whole amount I recommended. A few tsp-TBS of lemon juice should be good, just taste it as you go if you question yourself!)

Raspberry grape (Careful, grape tastes like wine pretty quickly- only ferment a few hours!)

Herbal tea! (Remember i said don’t use herbal tea for brewing kombucha? Well, If you want the health benefits of herbal tea, now is the time to add it. This won’t make your kombucha fizzy, because herbal tea has no sugar. Though you can always sweeten it with a little honey afterwards)

Be creative and go wild!


INGREDIENTS:

Brewed Kombucha (to your liking)

Juice or a combo of juices. Fresh squeezed or bottled (preferably organic). *You can always just plop in fresh, frozen (defrosted), or dried fruit. It just won’t be as flavorful as the fruit juice.


DIRECTIONS:

1. Gather a bunch of empty old kombucha bottles, Pellegrino bottles, mason jars, or any glass bottle. Clean them very well.

2. Clean your hands and a bowl (big enough to fit your scoby into) well! Remove your scoby from your jar with your hands and place in a plastic or glass bowl and set aside in a clean area. **

My homemade ginger syrup is in the jar on the left. Look at flavor options above to learn how to make it.

3. Make or pick out your juices/fruit. I always like to do many flavors at once!

I used a 16 oz GT bottle. So I added 1/4 cup of juice.

4. Line up your glass bottles and fill them with the right amount of juice depending on your bottle side (look at chart above). Don’t worry if you add too little or too much. Kombucha is very forgiving!

I pour my brewed kombucha in a spouted measuring cup to make it easier to pour. A funnel is also a good idea too!

5. Pour your brewed kombucha in your glass bottle. Make sure you leave 2 inches from the top! You don’t want it to explode.

Don’t forget to leave 2 inches form the top!


6. Screw your caps on tight and let the bottled kombucha/juice sit on the counter or in the cabinet (out of direct sun light).


I keep mine in my food pantry. I have a whole shelf for my kombucha! I also line the shelf with a towel just incase it leaks.

7. Let it sit for a day at the minimum. Though, you can even go up to a few weeks. (The longer you let it go, the more it will turn into alcohol because you are fermenting it. If you are giving this to your kids, only ferment it for a day please.)

See the fizz?

8.Chill in your fridge (optional, but it tastes better) and carefully open! Some juices seem to fizz more than others so you will have to experiment! I always open mine over or near the sink because I have volcano kombucha’s all the time!

9. Sometimes if you ferment your kombucha/juice for a couple of days to a week, a little “juice scoby will form”. It usually looks like a piece of jelly. Just scoop it out and dump it or compost it.

Sometimes if you let it ferment for a few weeks, your little “juice scoby” will grow thick! This kombucha was blueberry flavored and I let it go for 3 weeks. It was a little strong, but still good :). Just take out these big juice scoby before you drink, or else they pretty much plug up the top! Kombucha is so fun.

10. Enjoy your homemade cup of Kombucha. A slice of lemon always makes it taste better. Remember (especially if you are on GAPS), to start off slow if you have never had kombucha before (like a few TBS at a time). This is because, like any fermented food, it can give you die off. Die off is when your body releases toxins because you are detoxing. Drinking kombucha is one way of detoxing. Just build up your serving size SLOWLY!


**SCOBY care:

I always put my scoby back in a new brew to keep it healthy and strong! Don’t forget to keep some starter liquid!

1. Always wash your hands very well before handling your scoby and always put in glass/plastic bowl or jar. Use a plastic knife if you want to cut it. Metal can sometimes kill your SCOBY.

2. After you have set aside you SCOBY what are you going to do with it?…there is 3 choices.

a. Ferment another batch: continuous brewing allows your kombucha to be as healthy as possible and it will brew faster.

b. Place in a jar or container in the fridge with enough reserved kombucha to cover your scoby. Putting it in the fridge will slow down your fermentation process when you start it back up. But it will definitely still work! You can forget about it in the fridge for many months!

c. Give it away, either your baby or a part of your scoby (cut it with a plastic knife).  *Tip: always keep an extra for yourself just incase yours get moldy!

So now you know how to make Kombucha! It is fun and will get easier the more you do it!


~Stay Gutsy, Caroline

disclosure 3