08.10.2012

Carrot Chips

So today I want to leave you with a simple easy recipe, dehydrated carrots or as I like to call them, Carrot Chips!

Why Carrot Chips?

Well, I has a lot of extra carrots lying around and I decided that drying them was the best option to save space..my freezer is way too packed! Dehydrated carrots are great to throw in soups or grind up into your homemade granola bars to make a carrot cake flavor?! That is what I am planning on doing..I will let you know how that turns out! Though, Carrot Chips are good just as a finger snack!

Carrot nutrition

If you didn’t know, carrots are packed with vitamin A. Vitamin A is great for healthy eyes..”all the better to see you with my dear”… I love Little Red Riding Hood!  They are also fairly high in vitamin k, and of course fiber. Carrots are very common veggie, and dehydrating is just another way to keep the veggies interesting! Since Carrot Chips are dehydrated, you are getting more nutrients for then volume!

Are these GAPS friendly?

If you can eat raw veggies on the GAPS diet, then YES you can snack on these. Though if you can only do cooked veggies on GAPS (it all depends on your stage), them maybe try lightly steaming them first. You might want to slice them a little thicker so they are not paper thin and fall apart on you. Just play around with the timing 🙂 Hope this helps!


INGREDIENTS:

Organic carrots (as many or as little s you want) ! No need to peel!


DIRECTIONS:

1. Wash and de-stem your carrots.

2. Use a mandolin or Cuisinart (easier if you are doing a lot!) to slice the carrots VERY thin. I use the smallest setting on my Cuisinart blade.

3. Spread the sliced carrots onto your dehydrating tray. I don’t worry about spreading them out super even. Mine usually end up in big clumps and they always end up shrinking a ton, so every carrot gets dried no matter what! 

* If you are using these as a “chip” you can sprinkle a little sea salt over them if you like. 

4. Dry in your dehydrator for 6-12 hours on 125-135 degrees. I tried to keep the live enzymes by drying it at 110 degrees, but it took 2 days..so I just crank up the heat a little more and eat raw carrots if I want the enzymes! 🙂

* Oven directions: Cook at 250 degrees for 45 minutes, toss frequently so none over cook.

5. Check on your carrots every few hours. They are done when they are very shriveled and crisp! Crinkle the up 🙂

6. Serve as a snack (like a “chip”) or use in a recipe (like homemade carrot cake granola bars). I ♥ Carrot chips.

*Store in a ball jar in a dark cabinet. They might lose their crispness over time, but they are still good to use in soups or recipes.

~Stay Gutsy, Caroline

disclosure 3
08.07.2012

Gutsy’s Newsletter!

Hey Gutsy Readers!

I made my first newsletter! I think I am going to send it out every week or two depending on the amount of posts I get out!

Please feel free to sign up for the newsletter if you have not already done so. (you can do so by signing up on my homepage on the left side under “sign up for gutsy’s newsletter”). You can forward it to a friend as well!

Thanks

My new kiwi fruit letter! Recipe is coming up soon!


Here it is!

http://us5.campaign-archive1.com/?u=1019d03d1781d05a524e6fdc9&id=d386c2bc7f

~Stay Gutsy, Caroline


disclosure 3
08.05.2012

GAPS Snickerdoodles

GAPS Snickerdoodle story..

So once again my sweet tooth sister was my inspiration for these GAPS snicker doodle cookies, I shouldn’t be surprised! She was my inspiration to make the GAPS lemon bars, and those were a huge hit! It all started with a simple craving for a cookie, but we like to make our desserts “healthy” in our house. These GAPS Snickerdoodle cookies are still a “treat”. Though, I bet you could get away with eating one with your breakfast!

GAPS Snickerdoodles are by far one of my family’s favorite cookies. These snickerdoodles are perfect, chewy, gooey, scrumptious delicious…should I keep going?  Of course they are rolled in cinnamon sugar to give them their trademark snickerdoodle taste and look. Not like you need anymore convincing, but if you do, GAPS snickerdoodles are the easiest cookie I have ever made.

snickerdoodles22

What makes these GAPS Snickerdoodles the best?

Well, I am glad you asked! First off, these cookies are grain free and egg free (they can even be dairy free if you choose)! Best of all, they are GAPS friendly! A little treat here and there on the GAPS diet won’t hurt if your gut can tolerate it. They are the perfect little cookie for anytime and any occasion. They have that crackle look from smashing the cinnamon coated balls of dough onto the pan. Ooo they are just so cute!

GAPS Snickerdoodle nutrition:

Almond flour is very nutrient dense and packed with vitamin E, magnesium, and potassium. Yeah! I love magnesium 🙂 Of course cinnamon is filled with fiber, along with manganese and calcium. If you didn’t know, high manganese foods can help keep your blood sugar levels balanced as well as help your body use key nutrients to help it function. For me, cinnamon is just one of those immediate yum scents when I bake with it, so it makes me feel relaxed. Honey is a great sweetener if you are on the GAPS diet because it is easy for your gut to break down. If you cannot have coconut crystals, just skip it and use cinnamon alone for the coating!

Get ready, get set, bake!

So what are you waiting for? These are super fast to make too. I really timed it, they take about 5 minute to pull all the ingredients out, 5 minutes to mix everything together, and if you have 1 set of hands to roll into balls, then roll into the cinnamon and the other set to smash..it takes no time at all! Total it took my sister and I, 20 minutes from start to finish! Now that is one easy cookie.


INGREDIENTS:

dry:

2 cups almond flour (I use Honeyville)

1/4 tsp sea salt

1/4 tsp baking soda


wet:

5 Tbsp ghee/butter Melted (coconut oil works too, but they will taste more coconutty)

1/4 cup honey or vanilla honey (omit vanilla extract if you use vanilla honey) **

1 1/2 Tbsp vanilla extract

** low sugar option: 2 TBS honey + 40 drops of stevia (2 squirt droppers full)


coating:

3 TBS coconut crystals (omit if you are on GAPS)

3 TBS cinnamon


DIRECTIONS:

1. Preheat oven to 350 degrees.

2. Line 2 cookie sheets with bleach free parchment paper.

3. Mix dry ingredients together.

4. Melt ghee/butter or coconut oil in a sauce pan over low heat.

5. Mix wet ingredients together in a separate bowl.

6. Mix wet into dry bowl and stir until all incorporated.

7. Mix the cinnamon and coconut sugar for the coating in a separate bowl.

8. Scoop 1 Tbsp of dough and roll it in a ball. **

9. Roll your ball of dough into the coating mixture an coat all the way.

10. Place your coated dough onto the cookie sheet and use a ball jar (grease the bottom with coconut oil/butter) and press down until your cookie is about 1/4 in thick. Lift up the jar and voila! (Thanks Urban Poser for the tip!)

11. Repeat for all of the dough. (We made about 20 cookies). Keep the smashed cookie dough  2-3 inches apart from each other, because they expand some.

12. Bake for 8 minutes. If you like them a little chewier-crunchy bake them for 10 minutes.

13. Let the cookies cool on the pan for 10 minutes (if you don’t they will fall a part when you try to pick them up!).

14. Carefully lift the soft cookies onto a plate. They will still be gooey and soft but over a few hours they will be a PERFECT texture!

15. Eat 1 or 2 or 3! Enjoy with a glass of homemade coconut milk!


**We made another batch for some friends and made baby GAPS snicker doodles. For the “mini” size use 1 tsp in step 8.

.

 hmm..I wonder what happened to the GAPS Snickerdoodle?

PicMonkey Collage

~Stay Gutsy, Caroline

disclosure 3
08.03.2012

Caroline’s GAPS story!

 Who’s that baby? It’s me 🙂

 Aren’t I a cute baby? But why no clothes? Read about Caroline’s GAPS story here!

Hey Gutsy readers! Did you ever ready my GAPS story?

Read about it HERE!


..or you could read about my weirdness!


~Stay Gutsy, Caroline

disclosure 3
08.03.2012

GAPS Coconut Milk Yogurt! (dairy free)

Yum Yum yum.

GAPS coconut milk yogurt is the answer to your dairy free yogurt dreams!

Here is a recipe I know a lot of you have been waiting for. Thanks for being so patient!

googo

The road to the perfect recipe…

I have been experimenting with coconut milk yogurt for quite some time. After trying recipe after recipe, I decided to just go with my gut, and do what I thought would be best. Coconut milk yogurt experimentation should not be taken lightly! I don’t know about you, but for me, gelatin is hard to  get the hang of. Its tricky to find the exact consistent you want and you won’t know until many hours after you add it into the yogurt. I know that on GAPS many of you still cannot have dairy, even though it is fermented. It can take many months to heal your gut so you can have dairy again. In the mean time, don’t deprive yourself of your favorite foods! If you were once like me and loved your big bowl of yogurt and fruit, then giving yogurt up was hard! This is where coconut milk yogurt soars into the rescue 🙂

My big coconut milk yogurt flop!

I tried all types of dairy free yogurt but they were all filled with wired gums and goos. I thought to myself..why not make my own?! Well the first few times it was a big flop. I didn’t know that coconut milk doesn’t thicken like regular yogurt, so mine turned out exactly like cultured liquid coconut milk. I tried putting it through a cheesecloth..and well I got like 1/2 cup worth. I then brought out the Unflavored Grass fed Gelatin, and voila, this recipe was born. *confession: I actually put too much gelatin in and I didn’t want to waste it so I used beaters to see if anything would happen…YEP it made the perfect yogurt! I hope you like it as much as my friends and family do 🙂 Your effort will be well worth it.

Is coconut milk good for you?

YES! Coconut milk is one of natures best foods for your body! Think about the old days where you would find a coconut in a tree and it could be a whole meal. No wonder why there are so many different coconut products!

Coconut milk is filled with…

  •  lauric acid which is a fatty acid that is found in mom milk.
  • It promotes brain development and healthy bone growth.
  • It is a super anti viral, anti fungus, anti microbial. That means it can kill off the bad guys that make you sick or give you candida.
  • Coconut milk helps to control you weight, because fat does not make you fat.
  • It is filled with minerals so your skin, hair and even attitude should be better.
  • You bones will benefit from the phosphorus and iron will pump into your blood…and I am just getting started 🙂
  • Better yet coconut milk is great for the immune system and it easy on the gut. So if you are sick or on GAPS, coconut milk is a good choice.

Ferment it!

Whats better than plain coconut milk you ask? Fermented coconut milk. When you make this yogurt you are adding cultures to it. Anything fermented is always easier to digest for your body. Adding the grass fed gelatin is just an extra bonus. Really, this is one of the perfect GAPS foods. I consider this a truly gutsy food 🙂

Recipe Update: I want to make an update on this recipe. Many people have expressed how this recipe is time consuming, which I would have to agree. I have found that you can completely skip the fresh young coconut part and just used canned coconut milk, gelatin, an a starter or probioitc powder. Steps 7-12 are optional. I find that the young coconut just adds more nutrients and minerals but it actually tastes almost the same. I hope this helps 🙂

INGREDIENTS:

* I list using both coconut milks in this recipe because I find that the canned stuff is creamier, but more expensive. So I mixed the two. Feel free to just use one if you would like.

4 cups homemade coconut milk

1 ½ cans / (20.25 oz) / 2.5 cups :  coconut milk (BPA free) or this brand (no additives)

1 pureed young coconut meat (optional)-  This doesn’t really change the texture much. I like to use the water for young coconut water kefir, so I always have left over meat. Adding the young coconut meat also helps feed the fermentation process.

pinch of sea salt

3 TBS organic sugar or raw honey

8 tsp Unflavored Gelatin (grass fed)

1 T vanilla (optional)

(Bacteria options): 1 packet of vegan yogurt starter, ½ cup premade coconut milk yogurt, open a few probitoic capsules or few scoops of this powder.

DIRECTIONS:

img_491413

1.  Make homemade coconut milk

DSCN2317

2.  Heat the 4 cups of homemade and the 1 ½ cans of canned coconut milk together in a stainless steel pot on the stove. Heat to 180 degrees. Use a candy thermometer.

DSCN2320

3. Take out 1 cup of the warm coconut milk, sprinkle the gelatin on the milk, and stir the gelatin until dissolved all the way. (This step is important so you don’t end up with gelatin clumps).

4. Add the 1 cup of dissolved gelatin/coconut milk back into the pot of warm coconut milk.

DSCN2321

5.  Add the sugar into the warm milk and stir until dissolved.

6. Let the milk cool down to 100 degrees. This takes a few hours, so I just left it on the stove to cool. Don’t put it in the fridge or ice bath because remember it has gelatin in it, and if you forget it, it will gelatinize.

DSCN2313

7. (optional step) While the coconut milk is cooling, crack open a young coconut. Learn how here!

DSCN2417

8. (optional step) Take 1 cup of the cooling coconut milk in the pot. (It doesn’t matter the temperature) and pour it into a blender.

DSCN2315

9. (optional step) Spoon your reserved young coconut meat from step 7. into the blender as well.

DSCN2319

10. (optional step) Blend away until smooth. It will be liquidly and easy to pour. DSCN2422
11. (optional step) Once the big pot of coconut milk is cooled down to 100 degrees, add the blended coconut meat minxture from step 10.

DSCN2408

12. (optional step) Stir.

DSCN2398

DSCN2399

13. Sprinkle over your culture starter (or premade coconut milk yogurt) into the coconut milk. I like to pour my coconut milk out of the pot and into a bowl with a spout.

DSCN2403

14. Stir

DSCN2411

DSCN2414

15. Pour coconut milk into 2 quart ball jars and screw on metal lids.

DSCN2416

16. Keep at a constant 110 degrees for 7-10 hours to ferment it. I put mine in my Excalibur dehydrator. But an oven would work too. You need the heat so the bacteria grows.

17. Check and taste after 7 hours to see if the sugar has been eaten up. It should not be as sweet anymore. If you want it sour, keep it going a few more hours.

DSCN2436

18. After it has been fermenting, you will see the liquid separated at the bottom. You will also see that it has not thickened. This is normal.

19. Refrigerate for 7-10 hours until firm.

DSCN2439

20. Take out of the fridge. The coconut milk should be solid like Jello. This is good!

DSCN2440

22. Spoon both coconut milk yogurts into a bowl.

DSCN2442

DSCN2443

DSCN2444

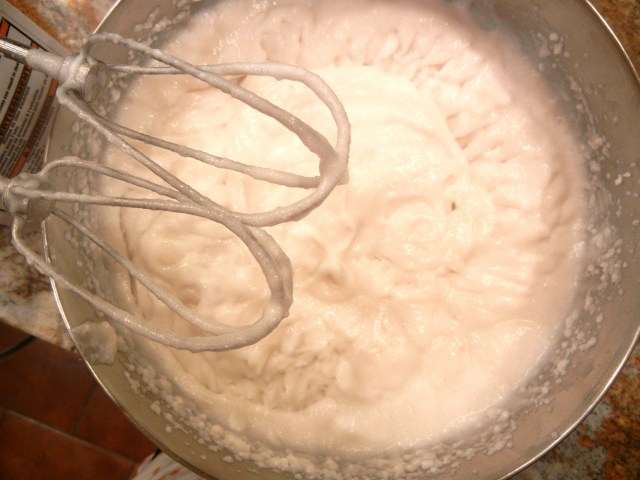
23. Beat the jello consistency coconut milk, until it is smooth and has no more clumps. This takes a few minutes. It will go through stages. Jello cubes, chunky, and then creamy.

DSCN2447

24. If yours creamy enough? If not keep beating..

24. Transfer the fluffy smooth coconut milk yogurt (should be a pudding texture) into a bowl (to eat) or back into the jars (to save for later)–> I like to use these single serving jars. It will be a little thicker once it has been refrigerated again for a few hours!

DSCN2466

25. Enjoy your yummy hard work!

Topping ideas:


cooonn

~Stay Gutsy, Caroline
 

disclosure 3