07.03.2012

Homemade coconut milk

Yum yum yum!

This is such an easy recipe! now I know a lot of you say you don’t have time for this…but really it can’t be easier and it is less expensive. I like homemade coconut milk to drink, to use in recipes, and smoothies.. but if I want the full coconut cream I will go ahead and use this canned coconut milk brand-it is BPA free. I like using both, but i have to say that it is nice to stretch what you are getting with you money- I often combine them which i then use to make coconut milk yogurt and coconut milk ice cream (family’s favorite food right now!).

Another plus is that you get coconut “fluff” as I call it. I use it in place of coconut flour, or at least part. It is lighter and gives you baked goods that nice coconut taste, without being too dense from the actual coconut flour. I will have to post a recipe some time soon because i am experimenting a lot with it right now.

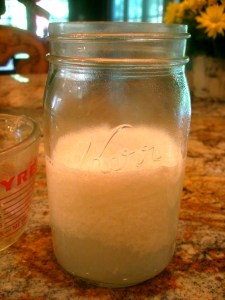
So here is the coconut milk homemade and easy of course 🙂 Doesn’t it look nice and smooth..mmm so light and a little sweet too from the coconut. I have two ways, one take about 15 min total (quick) and the traditional way takes more life 40 min total- but i do other things while i wait for the flavors to infuse the water. I usually forget about it honestly, but it will be ok for a few hours on the counter.

Ingredients:

2 cups Shredded Coconut Unsweetened

4 cups filtered water

vanilla extract (optional)

few drops of stevia/few tsp honey (optional)

few shakes celtic sea salt


Directions: ***(traditional way)*I prefer making the coconut milk this way because my coconut flakes are dehydrated 98 degrees and i try to keep the enzymes so i don’t want to boil it

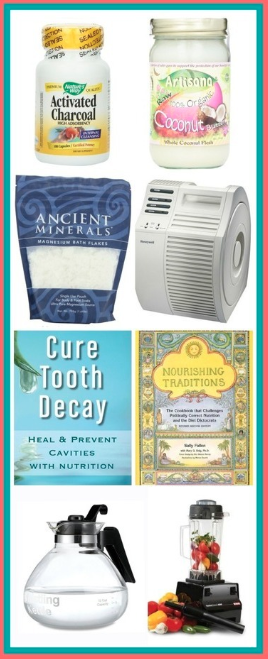
1. Boil water-let cool slightly (I love my Medelco 12-Cup Glass Stovetop Whistling Kettle ) 1. Boil water-let cool slightly (I love my Medelco 12-Cup Glass Stovetop Whistling Kettle ) 2. Put your flakes in a glass jar. 2. Put your flakes in a glass jar. 3. Measure your 4 cups of water. 3. Measure your 4 cups of water. 4. Pour your water over the flakes. 4. Pour your water over the flakes. 5.Let sit for 30 min in a quart jar. 5.Let sit for 30 min in a quart jar. 6.  Pour the coconut water in the blender. 7. Blend! 6.  Pour the coconut water in the blender. 7. Blend! 8.Set up the nut milk bag in a bowl.
9. Pour coconut pulp water through nut milk bag ( i use mine for everything juice/nut milks/tea..) 10.Strain through cheesecloth/muslin/or nut milk bag. 10.Strain through cheesecloth/muslin/or nut milk bag. * Strain into a bowl with a spout to make it easier to pour. * Strain into a bowl with a spout to make it easier to pour. 11. Stir in honey/stevia/sea salt and vanilla. 11. Stir in honey/stevia/sea salt and vanilla. 12. Take pulp (coconut fluff) out of nut milk bag- save in a container/jar in the fridge. 12. Take pulp (coconut fluff) out of nut milk bag- save in a container/jar in the fridge. 13. Save the pulp for baking! – lighter than coconut flour i will post a recipe soon on how to use “coconut fluff”. 13. Save the pulp for baking! – lighter than coconut flour i will post a recipe soon on how to use “coconut fluff”. 12. Drink! stays good in the fridge for up to 1-2 weeks..though mine never lasts that long at my house 🙂


***(quick way)***


1. Pour coconut flakes and water in a pan.

2. Boil water and coconut flakes for 10 min.

3. Let the water cool down a little so it does not burn you.

4. Pour the coconut water in the blender.

5. Blend!

6. Strain through cheesecloth/muslin/or nut milk bag.

7. Stir in honey/stevia/and vanilla.

8. Take out pulp from nut milk bag/cheesecloth save in a container/jar.

9. Drink! Enjoy

.

~Stay Gutsy, Caroline

disclosure 3
06.27.2012

GAPS pizza

pizza2

GAPS pizza crust:

Ok, so I showed you how to make the GAPS pizza crust …so now it’s time to bring it all together to make the WHOLE pizza. I will include our pictures from the crust as well, because we did it on a different sized pan.

pizza 1

How we did it:

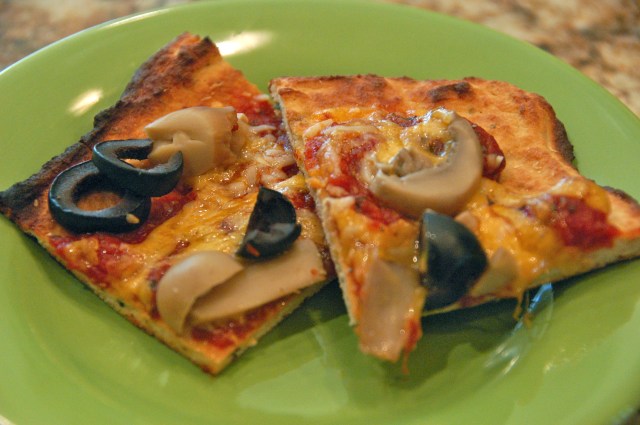
I prepped my ingredients before hand to make it easy to just toss them on. We kept our pretty simple but the combinations are endless. When I made this just for my mom I put on caramalised onions in butter, spinach, greek olives, and I put the raw milk cheese on at the last second and let it melt after I took it out of the oven (so you don’t kill all the good enzymes of course!). Mmmm..she loved it! So get creative. here are some ideas for pizza combos.

iii

Toppings:

1. cheese and black olives

2. organic pepperoni (nitrate free)

3. crumbled sausage, roasted green paper & mushrooms

3. greek olives, spinach, caramalised onions & feta cheese

4. sun dried tomatobasil, raw goat milk cheese (classy and simple!)

5. pesto sauce, fresh tomatoes, and raw milk cheese

6. pizza sauce and cashew cheese (dairy free version)–> recipe here

Screen Shot 2013-11-16 at 3.11.25 AM

DIRECTIONS:

DSC_0280

DSC_0281

DSC_0282

1. Make the crust – make two 9″ circles or one 15 x 10″ cookie sheet (lined with un bleached parchment paper of course). Freeze some pre baked crusts if you want, it makes an easy dinner. Oh, if you see in the pictures me using olive oil on the bottom of the crust, you can do that too.

DSC_0277

DSC_0287

DSC_0285

DSC_0292

2. Prep all you toppings, sauté the onions, cut up the olives, cook the sausage, crumble or shred the cheese, make you sauce, etc.

Sauce recipe: I use a simple recipe of garlic, “boxed” diced tomatoes, tomato paste, basil, oregano, and sea salt. Mix ingredients in sauce pan (its better to use a pyrex or ceramic when cooking acidic foods), smash everything with a potato masher, bring to boil and let simmer for a few hours to infuse the flavors. It should be thick so it doesn’t make the pizza soggy. Here is a jarred pre-made sauce with NO sugar added.

DSC_0296

DSC_0297

DSC_0298

DSC_0303

3. Spread sauce on pizza crust, put cheese and topping on.

DSC_0306

DSC_0307

4. Bake for another 10 min and can broil for a few min to get a nice golden brown look to your gooey cheese and toppings. It was helpful to broil when I had on a lot of topping and I wanted it to cook the faster only on the top.

DSC_0316

DSC_0313

5. Slice and pull apart gooey cheese and eat 🙂


pizza final22

~Stay Gutsy, Caroline

disclosure 3
06.27.2012

GAPS pizza crust!

 So who said you have to say good bye to pizza on GAPS??

pizza crust

It’s a Pizza party!

Pizza is just one of those foods you thought you would have to give up…right?  But really it is completely GAPS legal, as long as you use the right ingredients.

I do not do so well with coconut flour yet, but the rest of my family does. They all gave up flour in the house because I was having air borne reactions to flour. I always feel bad when they are craving pizza, especially because those boxed gluten free crusts look pretty stale/gross.

Coconut flour

My mom and sister are still on GAPS at different stages, but they can both have coconut flour. We just have to get a little creative with cheese for my sister- maybe I should try cashew cheese? For now I just cut it up like bread sticks and she dips in in pizza sauce. When I make it for my mom, the rest of my non GAPS family eats it too and LOVES it.

Bread substitute?

You can get so creative with this basic recipe.  It can be used as a GAPS bread. Just spread it on the pan like a square. It is kind of like flat bread that way and would make a great grilled cheese, almond butter & fruit preserves, bread for french toast, or just for a sandwich! But this recipe is specifically for pizza crust so I added garlic powder in it.

**This recipe makes two 9″ round crusts or one 16×10″ crust on a baking sheet


INGREDIENTS:

3 pastured egg yolks

1/2 tsp sea salt

1/2 cup Coconut Flour

1 cup coconut milk/ organic whole milk

1 tsp onion powder


DIRECTIONS:

a pizza11. Preheat oven to 375

2.  Mix all in a bowl with a whisk until no clumps are visible. Let the batter sit for a few minutes until the coconut flour get all absorbed. it will make a spreadable pastry dough.

3. Spread on a cookie sheet on top of parchment paper (you choose the thickness, for a crunchier crust make it thinner). I used a spatula for this.

4. Bake at 375 for 25-30 min until golden brown on bottom.  You can bake it a little longer to make it crunchier.

5. Slide the parchment paper out from underneath or if you are feeling brave flip it  this is easier with the smaller crusts)–> I do this by flipping it onto another cookie sheet.

6. Put sauce, cheese, and toppings on and cook for an additional 10 min until cheese is melted. (or just cut and serve bread-stick style!)

7. If you want to double the recipe, bake it like normal, let the crusts cool and the freeze it!

I hope this makes you pizza craving happy 🙂


.

.


.

..

~Stay gutsy, Caroline

disclosure 3
06.23.2012

chocolate vanilla cookies! (GAPS legal)

Hello!

I recently hosted a fermented veggie swap and these cookies I served at the party were a hit! Everyone one was asking for the recipe. I don’t usually use recipes, I just use my instinct, so I had to recreate the recipe and it turned out the same, so I guess remembered how to make them.

I will do a little recipe at the bottom on how I make GAPS chocolate drops. I cannot get a hold of cocoa butter right now so I used coconut oil. I found out that they melt VERY easily though, almost too easily. But they melt right into the vanilla cookie making it a chocolate vanilla cookie! Ok here it goes…

GAPS chocolate vanilla cookies

savveee

INGREDIENTS:

1 1/4 cup almond flour

2 T coconut flour

1/2 cup  honey or maple syrup

1/8 t Celtic Sea Salt®

1/2 Tbsp vanilla or 1 vanilla bean

Dash cinnamon

1 pastured egg + 1 egg white (2 Tbsp ground flax + 6 Tbsp of water –> use this recipe)

GAPS chocolate chips


DIRECTIONS:

1. Mix the almond flour, coconut flour, salt, cinnamon in a mixing bowl.

2. In another bowl mix eggs, vanilla, and honey.

3. Pour the liquid ingredients into the dry bowl.

4. Stir until mixed and let sit for a few minutes to let the coconut flour soak up completely.

5. Carefully and quickly mix in the GAPS chocolate drops, so they don’t melt and make the batter totally chocolate!

6. Bake at 350 for about 10-15 minutes (I made small ones so the time will vary. I never like to go by time, instead I go by when the cookie looks a tad golden brown around the edges)

7. Let cool and them remove from cookie sheet. Eat and refrigerate leftovers 🙂

~Stay Gutsy, Caroline

disclosure 3
05.22.2012

KoMbUcHa!

Its Tea time!

Today you will learn how to make kombucha! There is so many ways to make it, and i took many ideas to create the most economical and practical way for my family. I forgot to take a lot of step by step pictures along the way because i had a kombucha get together with some friends and was having so much fun. Though next week when we make our next batch i will just add the pictures to this post. Whenever i read a recipe i want SIMPLE easy steps make it much more doable.. and i like a little background information about it too!

Here is my kombucha ready to sit on the counter for many days- we like your sour!

WHY SHOULD YOU DRINK KOMBUCHA?

1. It is a yummy fizzy, slightly sweet tangy drink low in sugar, calories, and caffeine (the bacteria eats all the sugar)

2. It is cheap…compared to the store, you will save a lot of $

3. It is FUN to make 🙂

4. Kombucha is full of good bacteria to help replenish your gut. Good Gut bacteria will in turn help heartburn, digestion, acid reflex, bloating, and many more things. Though don’t drink it too much too fast because you may get die off detox symptoms. Start slow and listen to your body.

5. It is high in b-vitamins. So you will stress less because b vitamins help you stay calm and your memory will be better!

6. Helps detox your body and matain a healthy liver

7. boosts the immune system- 80% of the immune system is in the gut so if you fill you gut with good bacteria it will in turn help your immune system- this mean less sickness!

8. It can give you a afternoon pick up and increase over all energy levels.

9. Helps you loose weight because it improves digestion and is a good substitute for all you soda drinkers.

10. Make your skin clearer, heals eczema, and oily skin- apply plain kombucha topically and drink it as well for optimum results.  (i have not tried this yet)

11. Good for hangovers- because it is a liver tonic

12. Helps constipation- this is because it aids your digestion

12. Improves the color of your hair- you can use it externally  in the shower too!! (i have not tried this but I am going too)

WHAT IS KOMBUCHA MADE OF?

lactic acid: good for digestive system

acetic acid: it inhibits harmful bacteria. This gives the kombucha its distinctive smell and taste.

malice acid: used for detoxing in the body

oxalic acid: is a cellular production of energy

gluconic acid: effective against yeast like Candida

butyric acid: produced by yeasts and helps fight yeast in the body ( like heals like…again..just like the cancer mushroom)

nucleic acid: aids in healthy cell regeneration

amino acid: building blocks of protein- helps rebid mucles

enzymes: catalysts that speed the rate of reactions in the body- helps digestion

Vitamins B, C, beneficial yeasts, and living bacteria

resource: http://www.getkombucha.com/

HISTORY:

Kombucha has been used for over 2000 years in China, Japan, and Korea. SCOBY’s were passed down from generation to generation. One story goes that a doctor in Moscow discovered that his patients did not get cancer. This was because to save on money, they brewed Chage or birtch-tree mushroom tea. Actually this birtch-tree mushroom is cancer on the tree!! So they were using cancer to cure cancer. Chage is related to the kombucha mushroom, but the real kombucha mushroom has many stories of origination. SCOBY stand for Symbiotic Colony of bacteria and yeast.

EXTRA PRECAUTIONS:

1. Wash everything you are going to touch…pots, jars, lids, spoons, your hands. You don’t want to get new bad bacteria on your SCOBY because that is how is gets weak and moldy.

2. Don’t let your SCOBY touch metal! and don’t ferment in plastic!

3. Never use sugar or tea that is not organic- pesticides, fluoride, and anti-caking agents can kill the SCOBY

4. Only use filtered water- chlorine can kill the SCOBY too.

5. Always keep an extra SCOBY on hand just incase yours gets moldy

6. always reserve 2 cups of fermented kombucha liquid for the next batch as a starter

7. Never put the SCOBY in hot water

8. Don’t use herbal tea because they contain oils that will damage your SCOBY. if you want to use it, put it in for the second fermentation.

9. Always throw away a moldy SCOBY as well as the batch of tea it was in and start over! you don’t want to take any chances and make yourself and family sick. I know this is a bummer..but that is why you have to remember to save an extra.

10. Keep your kombucha away from anything else that is fermenting as well as plants so mold spores don’t contaminate the SCOBY and kombucha batch.

WHAT YOU NEED:

metal pot (for boiling 4 cups of water)

gallon glass jar

cotton light towel/ cheesecloth

rubberband

spoon (not metal)

6 t of tea (black/ green/ white) or 6 tea bags

1 gallon of filtered water

1 cup of reserved liquid from pervious batch

1 SCOBY

1 cup organic cane sugar ( don’t skimp on the sugar, the sugar will ONLY feed the bacteria, not your body) —-i used this site as a sugar resource in case you are interested in experimenting with sugars:

http://www.kombuchakamp.com/what-is-kombucha/kombucha-mushroom-tea-brewing-safety-tips/types-of-sugar-to-use-for-brewing-kombucha

STEPS:

1. clean EVERYTHING, use 1. soap  2. rinse well with water  ( you don’t want extra soap residue around your SCOBY) 3. spray with hydrogen peroxide- counters, lid, jar (i use food grade hydrogen peroxide form Guardian of Eden)  4. rise again with water  5. air dry

2. boil 4 cups of filtered water

3. add tea bags or loose leaf tea (no tea ball is necessary)

4. simmer tea for 10 minutes ( 10 minutes ensures all the nutrients from the tea are released)

5. turn off the heat and let steep for 10 more minutes

6. strain out tea bags or loose tea

7. while it is still warm stir in sugar until dissolved

8. pour sweet tea mixture into your gallon jar

9. fill the rest with filtered water ( room temperature) – but save room for your SCOBY,  1 cups of reserved liquid, and keep at least 2 inches from the top

10. pour 1 cup of previous reserved kombucha into jar (or if you don’t have that much add 2 TBS of raw ACV into jar)- this just jumpstarts the good bacteria

10. The water should be cool once you put in all that filtered water, so your SCOBY should be safe. You want the sweet tea temp below 80 degrees

11. put in your SCOBY ( smooth/ white/ creamy side up)!- make sure your hands are clean

12. cover with dish cloth and secure with rubberband

13. put it in a warm (70-85 degrees) dark place for 4-8 days – the warmer it is the less time you will need  (we put our on the counter by our crock pot because our house is cool)

14. bottle it in smaller bottles for a 2nd fermentation (learn how to here) -and then you can flavor it and make it even fizzier!..post to come soon 🙂

We keep our kombucha by the crock pot so it stays warm and ferments faster

EXTRA HINTS:

*Some people like it sweet so you will need less days for it to ferment. If you like it sour you might need to go a few more days. To test it stick a straw or plastic spoon and taste the liquid- no double dipping and no metal

*Allowing 8-14 days will make a vinegary taste which has a lot of medicinal properties and can even be used in the place of vinegar

* If you don’t want to make kombucha at a constant brew then store 2 cups of liquid or enough to cover the SCOBY and store it in a jar in the fridge. It will stay dormant for months without going bad. Though it is BEST to keep continually brewing new batches to keep the kombucha strong. Also a dormant SCOBY in the fridge is more susceptible to mold, so keep an eye on it.

* After your kombucha is done it will form a baby- keep the mother and baby attached for a 2-3 brews to allow the baby to grow 1/4 -1/2 inch thick. Then you can separate the two SCOBY’s and give the mother to a friend!

* When you give away a scoby, put it in a clean jar and cover with 1-2 cups of reserved kombucha liquid from your last brew

* you want a strong starter tea that is very acidic- this will help kill off the bad bacteria.

* For a faster and stronger fermentation you can add another cup of starter tea

*Black tea contains the most glucuroic acid, which is good . But Oolong tea makes a very yummy kombucha!

* extra kombucha tea FAQ

http://www.culturesforhealth.com/kombucha-tea-frequently-asked-questions-faq

HAVE FUN!! I hope i didn’t overwhelm you with information, but you can read it over 1 or 2 or 3 times. Be patient with yourself, practice, and soon it will be second nature to brew kombucha!  If you have any questions, please post below. Happy fermenting 🙂

~stay gutsy, caroline


disclosure 3